Vinyl Flooring Installation: A Comprehensive Guide
Vinyl flooring has become a popular choice for homeowners seeking durability, affordability, and style. Whether you're renovating a single room or updating your entire home, understanding the installation process, cost factors, and available options can help you make informed decisions. This guide explores everything you need to know about vinyl flooring installation, from DIY approaches to professional results.

Understanding Vinyl Flooring Installation Costs & Factors
When planning a vinyl flooring project, understanding the cost structure is essential. Several factors influence the total investment, including the type of vinyl you choose, room size, subfloor condition, and whether you hire professionals or tackle the project yourself. Luxury vinyl plank (LVP) and luxury vinyl tile (LVT) typically cost more than standard sheet vinyl due to their enhanced durability and realistic appearance. Labor costs vary significantly across Canada, with urban centers generally commanding higher rates than rural areas. Additional expenses may include subfloor preparation, removal of existing flooring, underlayment, trim work, and finishing touches. The complexity of your room layout, including corners, doorways, and irregular shapes, can also impact both material waste and installation time.
Prices, rates, or cost estimates mentioned in this article are based on the latest available information but may change over time. Independent research is advised before making financial decisions.
Unlock Affordable Style: Vinyl Flooring Installation Guide
Vinyl flooring offers an attractive balance between aesthetics and budget-consciousness. Modern vinyl products replicate the appearance of hardwood, stone, and ceramic tile with remarkable accuracy, allowing homeowners to achieve high-end looks without premium price tags. The installation process varies depending on the vinyl type you select. Sheet vinyl requires careful measurement and cutting but covers large areas quickly. Vinyl planks and tiles offer more flexibility for DIY installers, with click-lock systems that eliminate the need for adhesives. Before beginning installation, ensure your subfloor is clean, level, and dry. Minor imperfections can telegraph through vinyl flooring, affecting both appearance and longevity. Acclimate your vinyl materials to room temperature for at least 48 hours before installation to prevent expansion or contraction issues later.
DIY Vinyl Flooring: Cut Costs & Boost Home Value
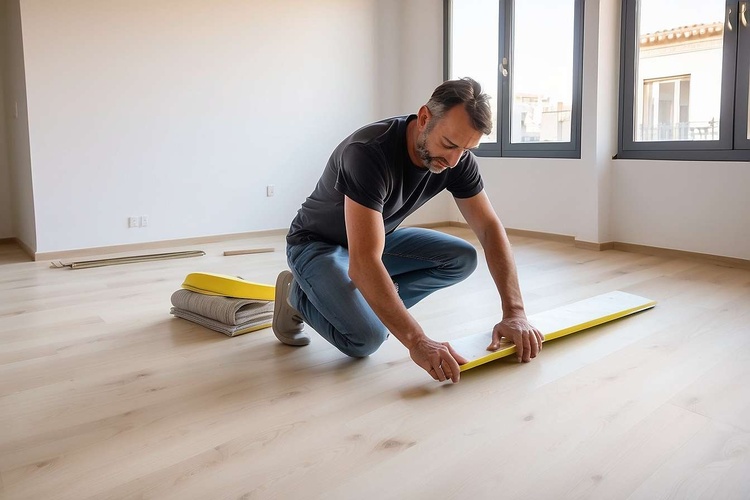
Taking a do-it-yourself approach to vinyl flooring installation can significantly reduce project costs while adding sweat equity to your home. DIY installation eliminates labor charges, which typically account for 50-70% of total project costs. However, success requires proper preparation, the right tools, and realistic assessment of your skill level. Essential tools include a utility knife, straight edge, tape measure, chalk line, and roller for adhesive applications. Click-lock vinyl planks are particularly well-suited for beginners, as they require minimal tools and no adhesives. Start in a corner or along the longest straight wall, working your way across the room. Stagger plank seams by at least 6 inches to create a natural appearance and structural stability. Leave expansion gaps around room perimeters, typically 1/4 inch, to accommodate natural material movement. While DIY installation saves money upfront, consider whether potential mistakes might cost more in materials and time than hiring experienced installers.
| Vinyl Flooring Type | Average Material Cost (per sq ft) | DIY Installation Time | Professional Installation Cost (per sq ft) |
|---|---|---|---|
| Sheet Vinyl | $1.50 - $4.00 | 4-6 hours per room | $2.00 - $4.00 |
| Vinyl Plank (LVP) | $2.50 - $7.00 | 6-8 hours per room | $3.00 - $6.00 |
| Vinyl Tile (LVT) | $2.00 - $6.00 | 6-10 hours per room | $3.00 - $5.50 |
| Peel-and-Stick Vinyl | $1.00 - $3.50 | 3-5 hours per room | $1.50 - $3.00 |
Prices, rates, or cost estimates mentioned in this article are based on the latest available information but may change over time. Independent research is advised before making financial decisions.
Top Vinyl Flooring Options for Easy DIY Installation
Selecting the right vinyl product significantly impacts installation ease and final results. Click-lock luxury vinyl planks rank among the most DIY-friendly options, featuring interlocking edges that snap together without adhesives. These floating floors can be installed over most existing surfaces, provided they’re level and stable. Peel-and-stick vinyl tiles offer another beginner-friendly option, with self-adhesive backing that simplifies installation. However, they require perfectly smooth, clean subfloors for optimal adhesion. Rigid core vinyl, incorporating stone polymer composite (SPC) or wood polymer composite (WPC) cores, provides enhanced stability and durability. These products resist denting, handle temperature fluctuations well, and work effectively in high-moisture areas like bathrooms and basements. When choosing vinyl flooring, consider wear layer thickness, which directly correlates with durability. Residential applications typically require wear layers between 12-20 mils, while high-traffic areas benefit from 20 mil or thicker protection.
Achieving Pro Results: DIY Vinyl Flooring Installation Tips
Professional-quality results require attention to detail throughout the installation process. Begin with thorough subfloor preparation, filling cracks, sanding high spots, and ensuring complete levelness. Use a self-leveling compound for concrete subfloors with significant irregularities. When cutting vinyl planks or tiles, score the surface multiple times with a sharp utility knife rather than attempting to cut through in one pass. This technique produces cleaner edges and reduces material waste. Maintain consistent expansion gaps around all room perimeters and vertical surfaces, using spacers to ensure uniform spacing. For adhesive installations, apply the correct amount of adhesive and work in manageable sections to prevent premature drying. Roll the entire floor with a 100-pound roller after installation to ensure proper adhesion and eliminate air pockets. Allow adequate curing time before moving furniture back into the room, typically 24-48 hours depending on the adhesive type. Install transition strips at doorways and where vinyl meets other flooring types to create professional-looking boundaries and protect edges from damage.
Long-Term Maintenance and Value Considerations
Proper maintenance extends vinyl flooring lifespan and preserves your investment. Regular sweeping or vacuuming removes abrasive dirt particles that can scratch the surface over time. Damp mopping with pH-neutral cleaners maintains appearance without damaging the wear layer. Avoid harsh chemicals, abrasive scrubbers, and excessive water, which can seep into seams and cause edge lifting. Place protective pads under furniture legs to prevent indentations, and use area rugs in high-traffic zones for additional protection. Quality vinyl flooring typically lasts 10-20 years with proper care, offering excellent return on investment. When installed correctly, vinyl flooring can enhance home value by updating appearance and improving functionality. While it may not command the same premium as hardwood or natural stone, well-maintained vinyl flooring appeals to buyers seeking low-maintenance, durable surfaces. Document your installation with photos and keep warranty information for future reference or potential home sales.


